DIY Laundry Room Sign
I don't have a fancy laundry room. It's in a storage area in the unfinished part of our basement. As I was cleaning up the area, I thought I would like to put a small sign just to spruce it up a bit.
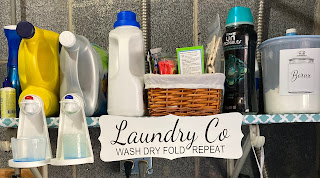
Looking on the internet, I saw this cute sign (below) that caught my attention. I really didn't want to spend $20 on a little sign and then thinking about it, I thought why not make it myself.

Hobby Lobby was my first thought to find an unfinished wood sign and I was correct, they did have something I liked and it was only $2. I had everything else in my arsenal of crafts to make it.
If you are interested in making one similar, here's what you need:
- Unfinished wood sign
- Chalk paint
- Cricut or another custom cutter
- Vinyl whatever color you would like
- Cutting mat
- Sponge brush
- Transfer paper
- Cricut Scraper & Spatula Tool
Instructions:
- The first thing you need to do is get out all your supplies and get organized.
- Paint the sign and let it dry.
- Decide what font & size you want to use on your sign.
- Use the tools to pick up the excess vinyl. Then use the transfer paper to transfer the cut words.
- Line up the transfer paper onto the sing board, make sure you eyeball it before setting it down or it may have problems getting it to come off. Use the scraper tool to help adhere the letters on the board. Pull off the transfer paper, and don't throw it away, you can use it again for another project.
- To hang it, you can drill holes on either side, attach it with some jute string and hang it on the wall or wherever you would like to put it. I decided to hot glue it to the shelf, at least for now.
Voila! You have a sign.
Please comment below 👇


Comments
Post a Comment