I don't know about you, but I get excited about fall decorating. The change of colors is always so pretty and fall just feels like such a cozy season.
One of my other favorite things about fall is all of the wonderful scents. Ahhh, the crisp fall air! There’s something so magical about it, and it’s the perfect time of year to enjoy all of the delicious aromas that come with the season. The rich spices like ground cinnamon and cloves bring a warmth to the air that can’t be denied. Whether you’re cozying up to a fire, baking a delicious treat, or just taking in the sights and smells of the season, the crisp fall air, the rich spices, fresh apples, ground cinnamon, and cloves are all sure to bring a smile to your face. What's not to love?!
DIY simmer pots are a great way to make your home smell amazing with no added chemicals or artificial fragrances. The scent of apple pie will fill your home in no time! It only takes a few minutes and it really does make the house smell sublime. It’s also fun to experiment with different ingredients, so play around with what you have and see what you can come up with.
I usually make this simmer pot on the stove but decided to try my small 1.5-quart slow cooker, because I don't have to keep such an eagle eye on it. If you are interested in a small slow cooker try this one ➤ Amazon.com: Elite Gourmet MST-250XW# Electric Slow Cooker.
APPLE PIE Simmer pot
1 small apple thinly sliced
2 cups liquid (apple cider, apple juice, or water)
1 tbsp. whole cloves
3-4 cinnamon sticks
1 tbsp. nutmeg
Add all of the ingredients to a small saucepan and stir. Bring to a gentle boil and then reduce heat to low. Continuously add more liquid (either cider or water) as needed and do not allow it to dry up.
Or do add all the ingredients to a crockpot, stir, and select the HIGH setting. Once it's hot, you can turn the setting to LOW or WARM.
Stir it up every hour to get the scent going.
If you use a crockpot, you may need to increase the recipe size depending on the size of your crockpot.
I will keep the mixture going in the slow cooker for up to a week. This is a great way to enjoy the scent for an extended period of time, and also to be able to adjust the strength as desired. Each evening, I turn off the slow cooker, and in the morning I turn it back on. As the week progresses, I may add in some citrus peels or apple cores to give a bit of extra flavor, or I may add a bit more of the spices I used in the beginning. This ensures that the scent remains strong and fragrant throughout the week. I keep it going until either it doesn’t look too good, or the smell isn’t as strong as it was when I first started.
Do you use a simmer pot to make your house smell delicious? We'd love to hear from you. Comment and share below!
Keep it sassy,
Kelly
FTC DISCLAIMER: This page informs you of our disclosure statement regarding the advertisements we use and disclosure of our Service and the choices we have associated with it. The compensation received will never influence the content, topics, or posts made in this blog. All advertising is in the form of advertisements generated by a third-party ad network or affiliates. Those advertisements will be identified as paid advertisements. The owner(s) of this website is not compensated to provide opinions on products, services, websites, and various other topics. The views and opinions expressed on this website are purely the owners. If we claim or appear to be experts on a certain topic or product or service area, we will only endorse products or services that we believe, based on our expertise, are worthy of such endorsement. Any product claim, statistic, quote, or other representation about a product or service should be verified with the manufacturer or provider. This website does not contain any content which might present a conflict of interest.
Come along for our Sipping and Sampling of non-alcoholic beer with me, Kelly, and my husband Jay. It was a great way to experience different flavors and styles without the worry of overindulging. There are a wide variety of non-alcoholic beers available, ranging from light lagers to dark ales and everything in between. A non-alcoholic beer taste test can be a fun and educational way to explore the differences between different brands.
We understand that it can be difficult to give up drinking alcohol, especially if it has been part of your life for a long time. That's why we're here to let you know that there's an alternative: non-alcoholic beer. Non-alcoholic beer is becoming increasingly popular and for good reason. It has all the same flavor as regular beer but without the alcohol content. This makes it a great option for those who want to enjoy the taste of beer without the associated risks of alcohol consumption. Non-alcoholic beer can be enjoyed with friends, at parties, or just for a refreshing drink on a hot day. Plus, it's also a great way to still be involved in the camaraderie of drinking beer with friends without having to worry about how much you've had.
Although I don't particularly like beer, my husband does. He loves the taste, the smell, and the way it looks when the foamy head is poured into a glass. He often talks about the different types of beer he has enjoyed, mainly crisp lagers. I don't mind watching him enjoy a beer, but I usually prefer something a bit more flavorful, like a glass of wine or a cocktail.
Amazon.com is proud to offer a Non-Alcoholic Beer Variety Pack, featuring 12 bottles of some of the best non-alcoholic beers available. This pack includes Beck’s, Bitburger, Buckler, Clausthaler Dry Hopped Amber, Coors, St. Pauli Girl, Einbecker, Erdinger, Kilber, O’Doul’s Lager and Amber, and Stella Artois. All of these beers provide the flavor of traditional beer without the alcohol. Whether you’re looking for a refreshing beverage for yourself or a gift for someone who doesn’t drink alcohol, this variety pack is sure to please. Plus, it’s conveniently sold in one case of 12 bottles, so you can enjoy all of these beers at once. So make sure to grab your Non-Alcoholic Beer Variety Pack from Amazon.com today and enjoy the flavor of beer without the alcohol.
Jay is a huge fan of craft beer, and he is always on the lookout for something new to try. His favorite beer was Clausthaler Dry Hopped Amber. He loved the full-bodied flavor and the slight sweetness of the malts. The dry-hopping process used to make this beer gave it a perfect balance of hops and malt that was simply irresistible to him. The aroma of the beer was a nice mix of citrus, floral, and herbal hops. The taste was smooth and balanced. The finish was slightly bitter, yet still smooth and balanced. The unique taste and aroma of this beer made it his favorite in the pack.
When it comes to non-alcoholic beer, nothing beats a full-bodied, robust flavor like the Clausthaler. All the other beers were light and watered-down tasting, lacking the complexity of flavor that a good beer should have. They were simply too dull and lacked character. It was like drinking water and not the kind of beer you'd want to savor. Our personal opinion, of course.
But, if you like light beer, this pack would be a great choice for those who enjoy a cold brew but don't necessarily want the high alcohol content or the heavy flavor that comes with some beers. Not only does the non-alcoholic beer have fewer calories and virtually no alcohol than regular beer, but it is also easier on the stomach and easier to drink because of the light flavor. Light beer is the perfect option for those who want to enjoy the taste of beer without the strong aftertaste or the heavy feeling that can come with it. So if you're looking for a beer that you can enjoy without the after-effects, this pack is a great option for you.
If you’re looking to try a variety of non-alcoholic beers, there are a few ways you can go about it. One of the easiest and most cost-effective ways is to buy a variety pack like the one from Amazon. Many stores now offer a variety of packs of non-alcoholic beer, which include different brands and styles. This is a great way to find out which beers you like and don't like without having to buy a bunch of full-size bottles or cans. If you’re feeling adventurous, you can also try a beer tasting or beer flight at a local brewery or bar. These beer tastings usually feature a few different types of non-alcoholic beers, so you can sample them before committing to buying a bottle or can. You might even find a new favorite non-alcoholic beer! With so many options available, there’s no excuse not to try the variety packs of non-alcoholic beer
Make sure to sample a few light lagers, a few dark ales, and a few malty beers. Once you have your selection of beers, pour each one into a clean glass and take a few moments to take in the beer’s aroma (if you happen to watch the video we made, we didn't use a clean glass at each tasting because of the time it would take to taste 12 beers). Take a sip of each beer and let it linger on your tongue before you swallow, noting the flavor and texture. Consider the differences between the beers - is one more carbonated than the others? Does one have a stronger flavor than the others? Are there any surprises in the taste? Finally, consider your overall opinion of the beers. Do you like one more than the others? Would you buy it again? With some exploration and tasting, you can become a well-informed consumer of non-alcoholic beer.
Buckler Euro Pale Lager (Netherlands) Brewed and bottled by Heineken
Kilber Euro Pale Lager (Ireland)
Ederinger Lager (Bavarian)
Stella Artois (Belgium) Brewed in St. Louis
Clausthaler Original Lager (Germany)
Becks Lager (Germany)
Heineken Lager (Amsterdam)
O'Doul's Lager
Coor Edge Lager
Ships in a Special Box To Avoid Breakage
Whether you're pregnant, can't drink, won't drink, need to operate heavy machinery, or simply don't want a hangover tomorrow morning this premium non-alcoholic beer variety pack will help you choose the "poison" of your desire
Stay on the wagon and enjoy yourself without a buzz
This Variety Pack was created by Beverage Universe
So if you're considering cutting back on your alcohol consumption, we hope you'll give non-alcoholic beer a try.
Special thanks to Jay for helping me with the test taste, he enjoyed it more than me 😉
Do you drink non-alcoholic beer? What's your favorite? Please comment and share below.
Keep it sassy,
Kelly
🍺🍺🍺🍺🍺🍺🍺🍺🍺🍺🍺🍺🍺🍺🍺🍺🍺🍺🍺🍺🍺
Thank you for reading our blog post. If you haven't already subscribed to receive our weekly blog post and Recipe of the Week, just click the SUBSCRIBE button on the right of the page and you will be the first to find out what's going on in our sassy brains. 😜
The Recipe of the Week is a bonus for our subscribers and goes out via email mid-week.
So, don't miss out, and SUBSCRIBE TODAY!
FTC DISCLAIMER: This page informs you of our disclosure statement regarding the advertisements we use and disclosure of our Service and the choices we have associated with it. The compensation received will never influence the content, topics, or posts made in this blog. All advertising is in the form of advertisements generated by a third-party ad network or affiliates. Those advertisements will be identified as paid advertisements. The owner(s) of this website is not compensated to provide opinions on products, services, websites, and various other topics. The views and opinions expressed on this website are purely the owners. If we claim or appear to be experts on a certain topic or product or service area, we will only endorse products or services that we believe, based on our expertise, are worthy of such endorsement. Any product claim, statistic, quote, or other representation about a product or service should be verified with the manufacturer or provider. This website does not contain any content which might present a conflict of interest.
This DIY Bless This Home Fall sign is so adorable and easy to make using Dollar Tree products. This craft cost me all of $4. I did have some of the supplies already in my craft arsenal but even so, it’s a fraction of what you would pay for something similar at Hobby Lobby or some other home store.
Prep Time 5 minutes Active Time 15 minutesDrying Time 30 minutesTotal Time 50 minutes Difficulty Easy
Paint the pizza pan white with chalk paint. You really only need to paint the edges. Let dry completely.
Glue the round sign in the middle of the pan.
Glue the rope inside the edge of the pan.
Arrange the leaves at the top of the pan/sign and glue them.
If you are hanging this, you can use the twine that was originally on the sign and glue it to the back. I suggest not using the glue gun because of my experience. It fell off the wall. Oh well, you live and learn. Maybe try E6000 glue, but remember, it will take longer to dry.
VOILA! You have a simply beautiful sign to hang for the fall.
Here's a short video of the project ↓
Are you a crafter? Do you think you might like to make a sign like this one? We'd love to hear from you in the comments below.
Keep it sassy,
Kelly
😃😃😃😃😃😃😃😃😃😃😃😃😃😃😃😃
Thank you for reading our blog post. If you haven't already subscribed to receive our weekly blog post and Recipe of the Week, just click the SUBSCRIBE button on the right of the page and you will be the first to find out what's going on in our sassy brains. 😜
The Recipe of the Week is a bonus for our subscribers and goes out via email mid-week.
So, don't miss out, and SUBSCRIBE TODAY!
FTC DISCLAIMER: This page informs you of our disclosure statement regarding the advertisements we use and disclosure of our Service and the choices we have associated with it. The compensation received will never influence the content, topics, or posts made in this blog. All advertising is in the form of advertisements generated by a third-party ad network or affiliates. Those advertisements will be identified as paid advertisements. The owner(s) of this website is not compensated to provide opinions on products, services, websites, and various other topics. The views and opinions expressed on this website are purely the owners. If we claim or appear to be experts on a certain topic or product or service area, we will only endorse products or services that we believe, based on our expertise, are worthy of such endorsement. Any product claim, statistic, quote, or other representation about a product or service should be verified with the manufacturer or provider. This website does not contain any content which might present a conflict of interest.
We love our fire pit and use it year-round. My husband has become a great fire starter but we found out that having a little help makes it less work to get the fire going.
I’ve been making these fire starter rolls for a couple of years now and they’re super easy and cost little to nothing to make.
Materials you need:
Cardboard tubes
Dryer Lint
Cookie Tin
Candles
Wax paper
Empty can or a wax pouring pot
Essential oils, if you desire
Pan with water
Potholder
Instructions:
Create a double boiler by placing the empty can or pot in the pan with water. Make sure the can is clean and dry.
Place the candle into the can/pot.
Heat the water to melt the candle wax.
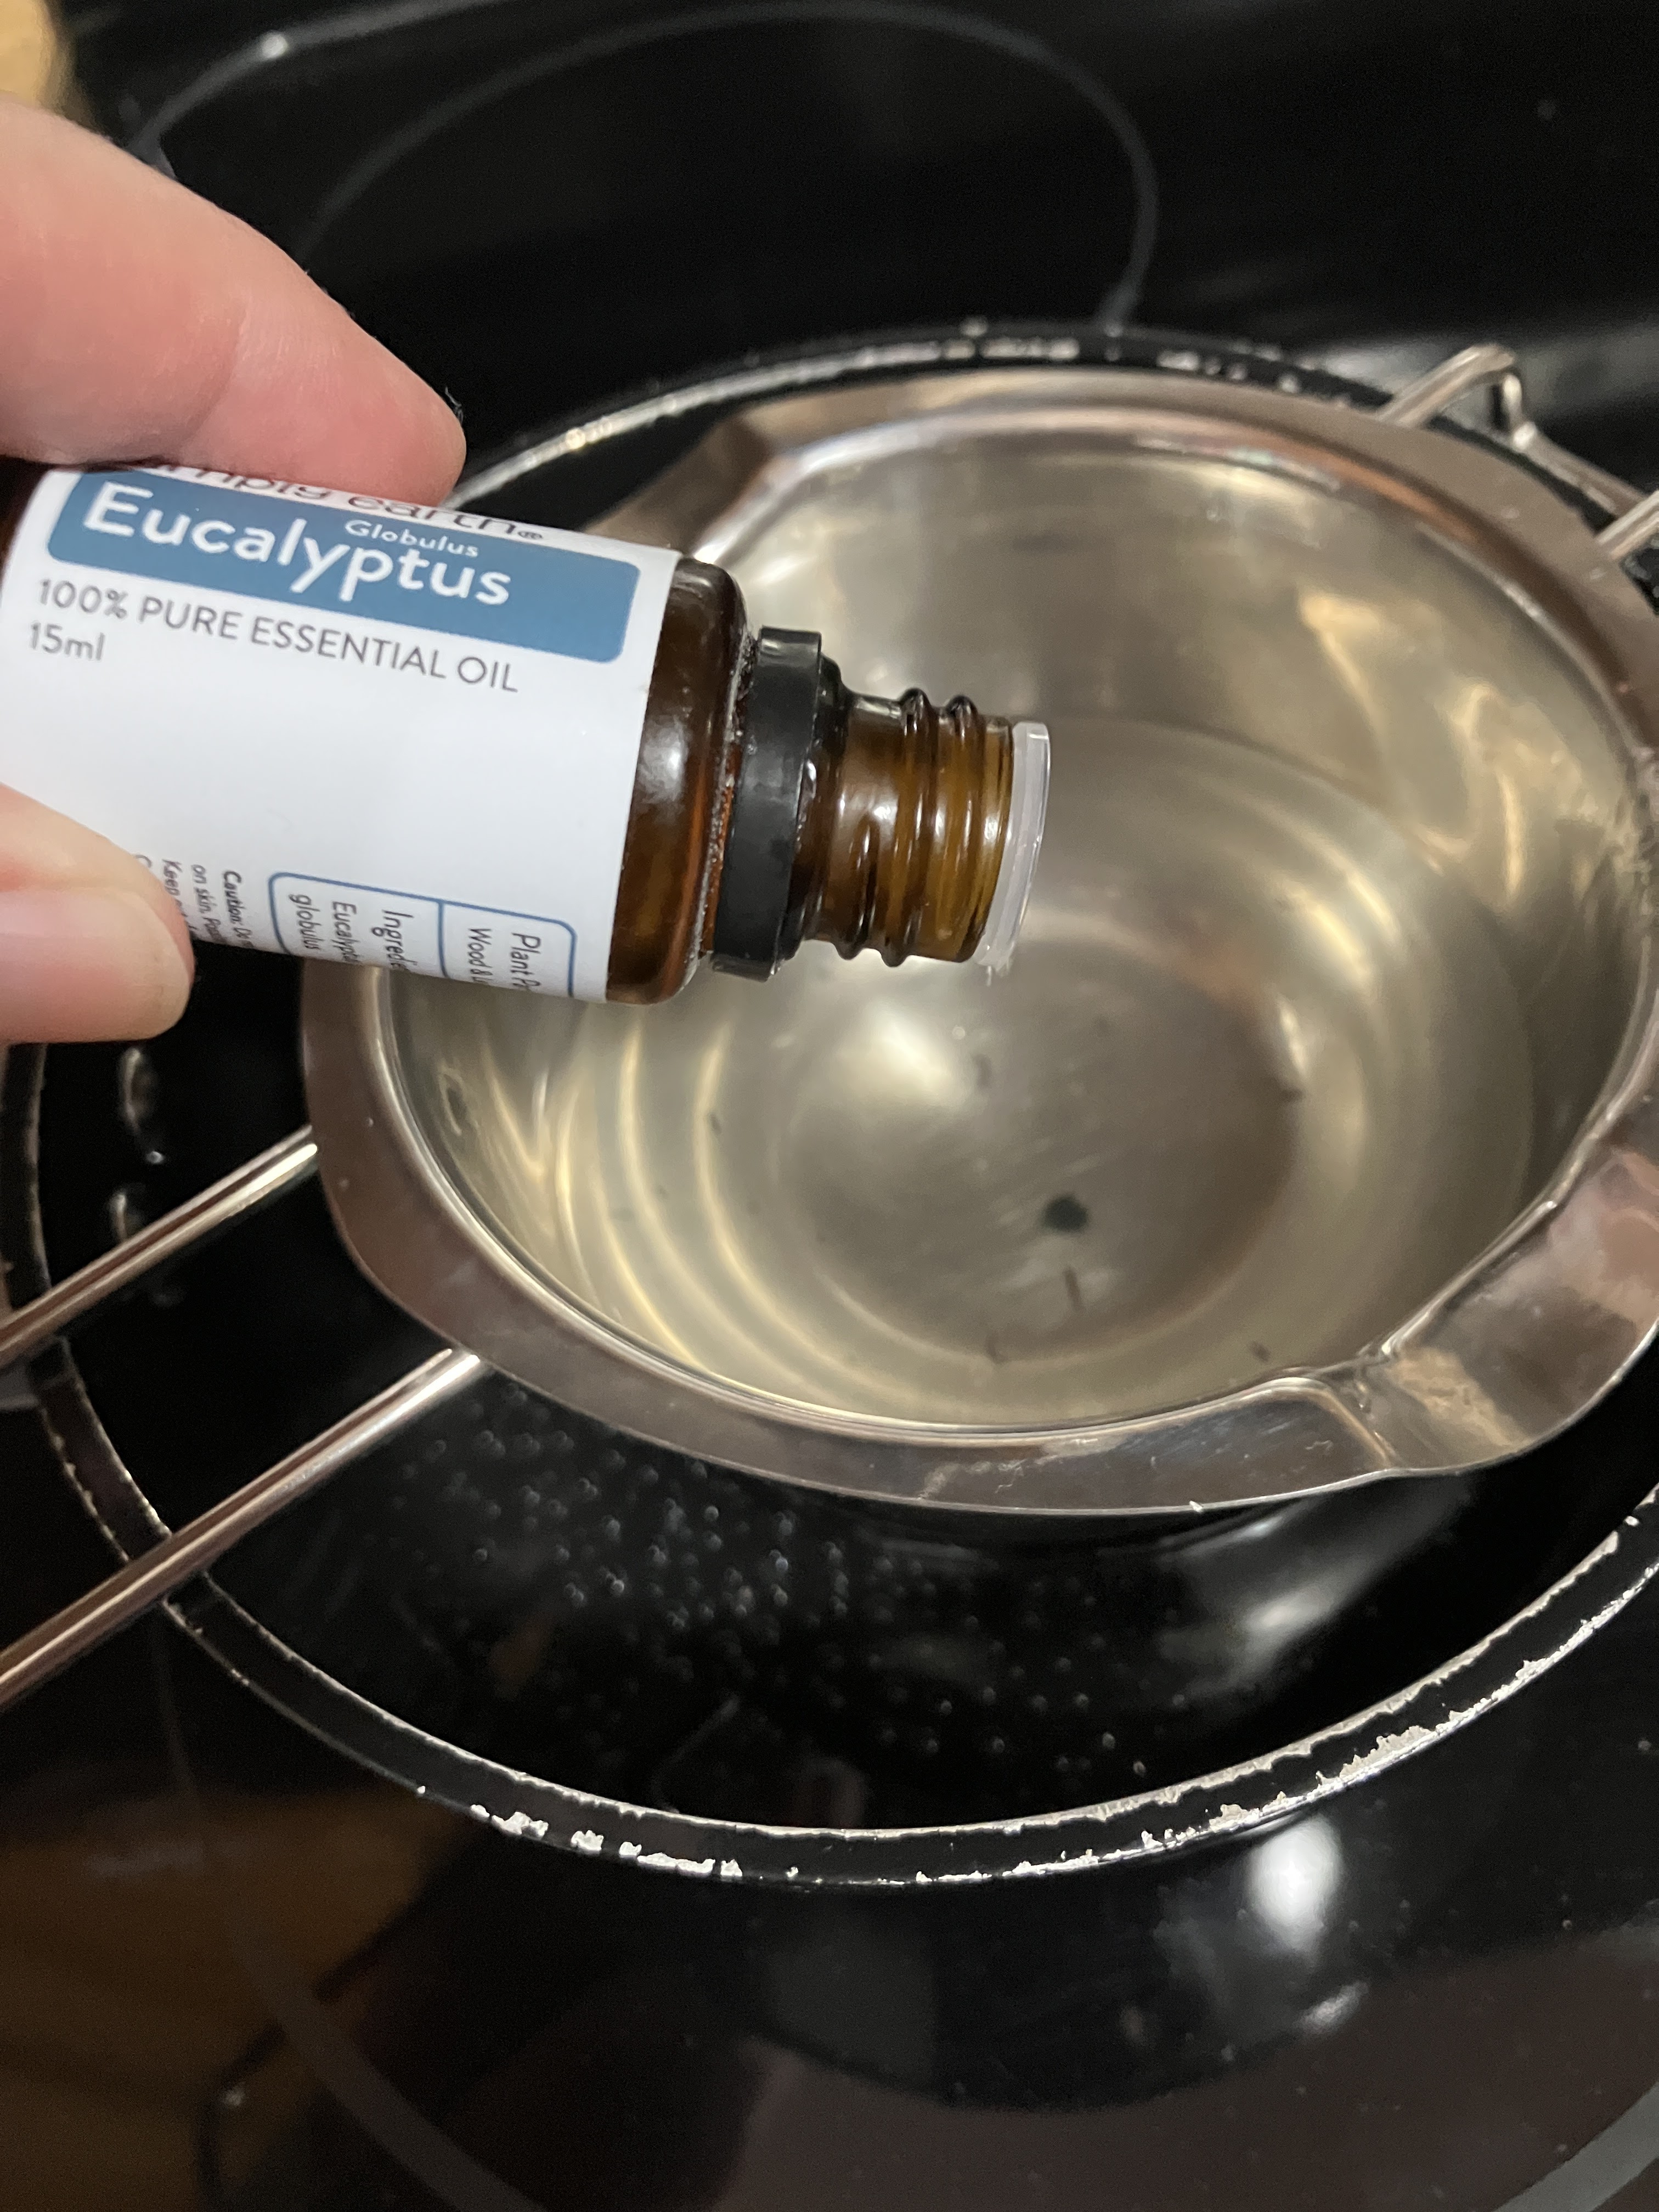
Drop a few drops of essential oils in the hot wax and stir. (Below are some essential oils you may use if you would like to keep the mosquitos away.)
Line the bottom of the tin with wax paper. Stand the cardboard tubes up on the end in the cookie tin.
Stuff some lint into each tube. Leave a bit of room to tuck the wax paper in.
Carefully pour the melted candle wax into each tube.
Let the wax harden. Turn the tubes over and add wax.
Remove the tubes from the tin.
Wrap the tubes with wax paper and twist/fold the ends towards the lint.
Use one fire starter log to start a campfire.
There are several essential oils that can be used to repel mosquitoes and are effective insect deterrents suitable for fire pits, fireplaces, wood stoves, and campfires.
Citronella essential oil
Eucalyptus essential oil
Peppermint essential oil
Lavender essential oil
Tea tree essential oil
Cedarwood essential oil
Also if you are looking for quality essential oils, we suggest doTERRA. Rhonda is a doTERRA representative and would love to help you. Contact her here → Rhonda Byler.
Watch the short video on how to make fire starters: ↓🠟
Do you have a suggestion on the use of fire starters? Comment and share below!
Keep it sassy,
Kelly
😃😃😃😃😃😃😃😃😃😃😃😃😃😃😃😃
Thank you for reading our blog post. If you haven't already subscribed to receive our weekly blog post and Recipe of the Week, just click the SUBSCRIBE button on the right of the page and you will be the first to find out what's going on in our sassy brains. 😜
The Recipe of the Week is a bonus for our subscribers and goes out via email mid-week.
So, don't miss out, and SUBSCRIBE TODAY!
FTC DISCLAIMER: This page informs you of our disclosure statement regarding the advertisements we use and disclosure of our Service and the choices we have associated with it. The compensation received will never influence the content, topics, or posts made in this blog. All advertising is in the form of advertisements generated by a third-party ad network or affiliates. Those advertisements will be identified as paid advertisements. The owner(s) of this website is not compensated to provide opinions on products, services, websites, and various other topics. The views and opinions expressed on this website are purely the owners. If we claim or appear to be experts on a certain topic or product or service area, we will only endorse products or services that we believe, based on our expertise, are worthy of such endorsement. Any product claim, statistic, quote, or other representation about a product or service should be verified with the manufacturer or provider. This website does not contain any content which might present a conflict of interest.
National Waffle Week is the first full week of September and since it's that time, we are going to share with you sweet and savory recipes that you can enjoy all week.
Level: Easy Total: 45 min Prep: 15 min Cook: 30 min Yield: 4 servings
Ingredients
3/4 cup all-purpose flour
2 tablespoons unsweetened cocoa powder
Fine salt
4 ounces bittersweet or semisweet chocolate, chopped
3 tablespoons unsalted butter, plus more for brushing waffle iron
1/2 cup sugar
2 large eggs, beaten
Vanilla ice cream, whipped cream, caramel sauce, sprinkles, and
maraschino cherries, for topping
Directions
Preheat a waffle iron to medium-high. Preheat the oven to 200 degrees F (to
keep cooked waffles warm). Sift together the flour, cocoa powder, and 1/8
teaspoon salt in a small bowl; set aside.
Combine half the chocolate and the butter in a medium saucepan over medium heat, stirring until melted and
smooth, about 5 minutes. Remove from the heat and let cool slightly. Stir in the sugar and eggs. Add the flour mixture
and remaining chocolate and stir until just combined.
Lightly brush the top and bottom of the waffle iron with butter. Fill the waffle iron about three-quarters of the way full
(some waffle iron should still be showing). Close the lid gently and cook until the waffles are cooked through and
slightly crispy around the edges, 4 to 6 minutes. Keep the cooked waffles warm in a 200 degrees F oven or cover with
foil on a plate while you make the remaining waffles
Top each waffle with ice cream, whipped cream, caramel sauce, sprinkles, and a cherry, if desired.
Level: Easy
Total: 1 hr 45 min
Prep: 25 min
Inactive: 1 hr
Cook: 20 min
Yield: 2 pizzas
Level: Easy Total: 1 hr &45 min Prep: 25 min Inactive: 1 hour
Cook: 20 min Yield: 2 pizzas
Ingredients
1/3 cup canned pureed tomatoes
1 tablespoon extra-virgin olive oil, plus more for brushing dough
Large pinch of kosher salt
2 to 3 fresh basil leaves, torn, plus more for garnish
1/2 small clove garlic, very thinly sliced
One 8-ounce ball of fresh pizza dough, halved, room temperature
All-purpose flour, for dusting
1/2 cup shredded mozzarella cheese
Parmesan, for sprinkling
Special equipment: waffle iron (preferably large)
Directions
Stir together the tomatoes, 1 tablespoon of olive oil, salt, basil and garlic.
Let sit at room temperature to give the flavors time to meld, about 1 hour
Preheat a waffle iron to medium-high. Lightly dust a clean work surface with
flour and roll out half of the pizza dough into a 6-inch round (or to the
maximum size your waffle iron can fit). Brush one side with olive oil and place
oiled-side down on the waffle iron, then brush the other side with oil. Close the iron (don't push down) and cook until
golden and cooked through 4 to 6 minutes. Repeat with the remaining dough.
Meanwhile, heat the tomato sauce in a microwave until hot. Spread each pizza with half of the sauce and half of the
mozzarella. Place one pizza back on the waffle iron and hold the top of the iron just over the cheese until melted, 1 to
2 minutes. Remove and garnish with basil leaves, drizzle with olive oil, and sprinkle with Parmesan. Repeat with the second
pizza.
Cut the pizzas into slices with a large knife or pizza cutter and serve.
Are you a Waffles fan? I've made all sorts of flavored waffles but have yet to try the pizza version. Sounds like a new recipe for me to try, how about you? Comment and share below!
Keep it sassy,
Kelly
😃😃😃😃😃😃😃😃😃😃😃😃😃😃😃😃
Thank you for reading our blog post. If you haven't already subscribed to receive our weekly blog post and Recipe of the Week, just click the SUBSCRIBE button on the right of the page and you will be the first to find out what's going on in our sassy brains. 😜
The Recipe of the Week is a bonus for our subscribers and goes out via email mid-week.
So, don't miss out, and SUBSCRIBE TODAY!
FTC DISCLAIMER: This page informs you of our disclosure statement regarding the advertisements we use and disclosure of our Service and the choices we have associated with it. The compensation received will never influence the content, topics, or posts made in this blog. All advertising is in the form of advertisements generated by a third-party ad network or affiliates. Those advertisements will be identified as paid advertisements. The owner(s) of this website is not compensated to provide opinions on products, services, websites, and various other topics. The views and opinions expressed on this website are purely the owners. If we claim or appear to be experts on a certain topic or product or service area, we will only endorse products or services that we believe, based on our expertise, are worthy of such endorsement. Any product claim, statistic, quote, or other representation about a product or service should be verified with the manufacturer or provider. This website does not contain any content which might present a conflict of interest.
We have been busy with product reviews lately and we would like to thank all those that have sent us products to review. If you are interested in sending us a product from our AMAZON WISHLIST, we would be happy to give you a shoutout and review the product.
Here are some of the products we recently reviewed on our Youtube channel.
Enjoy!
Folex Carpet Spot Remover, 32 oz & UKCOCO 3.5mm Universal Retro Telephone Handset, Holding A Cell Phone for Phone, Anti Radiation Receivers for Phone (Pink) 🠟
Quirzx 4 Pack Swan Drain Basket for Kitchen Sink 🠟
ElitaPro Luxury Edition, ‘Tornado’ effect Milk frother, Leading Tech Design, Triple Power Milk Frother Handheld, Rich Creamy Milk Foam in seconds (Black/Black) 🠟
We would love to hear from you and your thoughts on our videos. We can take a little criticism, preferably positive comments 🤣
Keep it sassy,
Kelly
😃😃😃😃😃😃😃😃😃😃😃😃😃😃😃😃
Thank you for reading our blog post. If you haven't already subscribed to receive our weekly blog post and Recipe of the Week, just click the SUBSCRIBE button on the right of the page and you will be the first to find out what's going on in our sassy brains. 😜
The Recipe of the Week is a bonus for our subscribers and goes out via email mid-week.
So, don't miss out, and SUBSCRIBE TODAY!
FTC DISCLAIMER: This page informs you of our disclosure statement regarding the advertisements we use and disclosure of our Service and the choices we have associated with it. The compensation received will never influence the content, topics, or posts made in this blog. All advertising is in the form of advertisements generated by a third-party ad network or affiliates. Those advertisements will be identified as paid advertisements. The owner(s) of this website is not compensated to provide opinions on products, services, websites, and various other topics. The views and opinions expressed on this website are purely the owners. If we claim or appear to be experts on a certain topic or product or service area, we will only endorse products or services that we believe, based on our expertise, are worthy of such endorsement. Any product claim, statistic, quote, or other representation about a product or service should be verified with the manufacturer or provider. This website does not contain any content which might present a conflict of interest.
I confess that I'm WAY past the childbearing years but our daughters are in that time of life. I do remember having menstrual pain and taking meds for relief but I wished I had a more natural way to help me.
My daughter's time of the month is excruciatingly painful and it really keeps her down from living a fulfilled life. So I did a little research to try and help her and found this EO blend that she could rub on her abdomen. Just maybe it would help. Sure enough, she said it cut the time she was in pain by half. I thought that was good news and had to share it with those that may need some help.
Here are some of the oils that help with menstrual cramps:
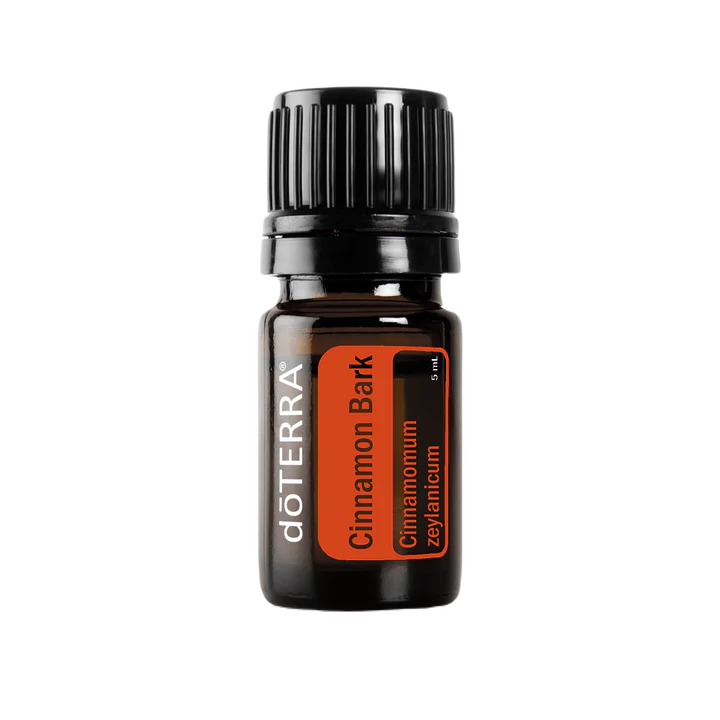
Cinnamon Oil
Clove oil
Lavender oil
Rose Oil
Let's take a closer look at why these oils are a benefit.
CINNAMON OIL - Cinnamon is already known as an effective, anti-inflammatory spice. So, it’s no surprise that cinnamon oil also fights inflammation and reduces menstrual pain.
In fact, a 2013 study looked at the effects of an essential oil massage versus a basic massage on period pain. The test group received daily massages using a blend of cinnamon, clove, and lavender oils (mixed into almond oil). The placebo group received daily massages with almond oil only.
The study revealed that:
“the level and duration of menstrual pain and the amount of menstrual bleeding were significantly lower in the aromatherapy group than in the placebo group.” (source)
CLOVE OIL - Similar to cinnamon, clove oil is also a well-known anti-inflammatory oil. One reason why clove oil is thought to be effective at reducing menstrual cramps is because it contains beta-caryophyllene and eugenol.
Beta-caryophyllene is a powerful anti-inflammatory compound, found in other infamous, pain-relieving plants: cannabis and hemp.
ROSE OIL - Don’t be fooled by the soft and delicate rose oil because it packs a punch when it comes to fighting pain!
Another study has also compared the effectiveness of rose oil and the prescription pain med, diclofenac sodium.
In that study:
One group of participants was treated with diclofenac sodium only.
Another group was treated with diclofenac sodium,plus 2% rose essential oil.
The results showed that the group that was treated with rose oil had stronger improvements in pain levels, compared to the group that was treated with pain meds only (source).
So, whether you use rose oil in a pure essential oil blend, or you use it along with pain meds, rose oil comes with some serious pain-reducing properties.
LAVENDER OIL - Lavender doesn’t just soothe the mind. It also soothes aches and pains.
A 2012 study combined lavender oil with clary sage and marjoram oils, in a 3% blend:
Study participants massaged the blend onto the lower belly every day from the end of their last cycle, until the start of their next cycle.
Participants were asked to evaluate their pain, both before and after the treatment.
The study concluded that there was a significant reduction in pain after just one menstrual cycle (source).
Doing a massage with lavender only has also been shown to relieve cramps. You can also get relief by inhaling lavender oil.
Science has shown that breathing in lavender oil all by itself is also effective at reducing period pain. Lavender oil contains beta-caryophyllene. This is the same compound found in clove (though the levels in lavender are lower).
The presence of this compound is likely one reason why lavender works so well at reducing period pain.
Also if you are looking for quality essential oils, we suggest doTERRA. Rhonda is a doTERRA representative and would love to help you. Contact her here → Rhonda Byler.
If you know someone who struggles with menstrual cramps, please send them this information. If it worked for my daughter then it just might work for someone you know.
Keep it sassy,
Kelly
💖💖💖💖💖💖💖💖💖💖💖💖💖💖💖💖💖💖💖💖
Thank you for reading our blog post. If you haven't already subscribed to receive our weekly blog post and Recipe of the Week, just click the SUBSCRIBE button on the right of the page and you will be the first to find out what's going on in our sassy brains. 😜
The Recipe of the Week is a bonus for our subscribers and goes out via email mid-week.
So, don't miss out, and SUBSCRIBE TODAY!
FTC DISCLAIMER: This page informs you of our disclosure statement regarding the advertisements we use and disclosure of our Service and the choices we have associated with it. The compensation received will never influence the content, topics, or posts made in this blog. All advertising is in the form of advertisements generated by a third-party ad network or affiliates. Those advertisements will be identified as paid advertisements. The owner(s) of this website is not compensated to provide opinions on products, services, websites, and various other topics. The views and opinions expressed on this website are purely the owners. If we claim or appear to be experts on a certain topic or product or service area, we will only endorse products or services that we believe, based on our expertise, are worthy of such endorsement. Any product claim, statistic, quote, or other representation about a product or service should be verified with the manufacturer or provider. This website does not contain any content which might present a conflict of interest.


.jpg)