Here are some delicious pumpkin desserts you'll fall in love with. From cheesecake to ice cream you will find a favorite. To find each recipe just click on the title above each photo.
You're sure to draw compliments with this delectable homemade dessert. Gotta love a pecan crust with luscious layers of cream cheese and spiced pumpkin.
This delicious pumpkin dessert proves your Thanksgiving meal doesn't always have to end with pumpkin pie. With a spiced pumpkin filling sandwiched between a cake-like crust and a sweet, crisp walnut topping, your holiday guests are guaranteed to love this pumpkin dessert. Serve with shipped cream or a scoop of vanilla ice cream.
I love pumpkin ice cream and this looks not only delicious but super easy and quick to make.
Photo Credit Taste of Home
What's your go-to pumpkin dessert recipe? We would love to hear from you in the comments below.
Keep it sassy,
Kelly
😋😋😋😋😋😋😋😋😋😋😋😋😋😋😋😋😋😋
FTC DISCLAIMER: This page informs you of our disclosure statement regarding the advertisements we use and disclosure of our Service and the choices we have associated with it. The compensation received will never influence the content, topics, or posts made in this blog. All advertising is in the form of advertisements generated by a third-party ad network or affiliates. Those advertisements will be identified as paid advertisements. The owner(s) of this website is not compensated to provide opinions on products, services, websites, and various other topics. The views and opinions expressed on this website are purely the owners. If we claim or appear to be experts on a certain topic or product or service area, we will only endorse products or services that we believe, based on our expertise, are worthy of such endorsement. Any product claim, statistic, quote, or other representation about a product or service should be verified with the manufacturer or provider. This website does not contain any content which might present a conflict of interest.
DETAILS: Seating, Wheelchair Accessible, Takeout, Table Service
Star rating: ⭐⭐ ⭐ ⭐ out of 5 see the reason below.
Living in the Culpeper, Virginia area is always a treat to go to the historic downtown and choose from many restaurants. We decided to check out the 4 C's this time around on our monthly get-together.
The 4 C's is known for its Peruvian and South American cuisine but also serves your favorite sandwiches, burgers, pasta, breakfast dishes, and more.
The restaurant is situated right on Main Street with parking on the side of the road, which we do not recommend, it's a busy street during the lunch hour. We parked on the side of the building in a parking lot.
As we entered the building, it brought us back to that old dinner that we are all familiar with. We didn't know whether to just seat ourselves or wait, so we just sat at a large dining table. There was plenty of seating available at the time we arrived. Once we found our seat we waited on the only waiter that was available. They did add a couple of waiters around noon. Our waiter was super friendly and helpful to us four old gals. We had lots of questions and he was patient.
It took a while for our food to arrive, but it took us more than a few minutes to decide what to order. Our order arrives at 12:25pm which is 50 minutes after arriving.
Cathy ordered the Papa Rellena which is fresh mashed potatoes filled with sauteed beef rolled, seasoned potato flour deep fried, and served with salsa Criolla. She loved it enough to go back and order it again. She also said she would take Momma Sassy for their popular breakfast.
Rhonda ordered the chicken and cheese quesadilla with salad. The plate looked nice with the salad in the middle of the sliced quesadilla. It didn't come with sour cream, so she asked for it and he brought it right away. The quesadilla was cooked just right, not overdone. It was full of flavor.
Mom ordered the Philly steak and cheese sub. She asked for grilled onions and they were happy to oblige. It looked good but not overly full. She didn't complain.
Iwanted to try one of their Peruvian dishes and ordered the Aji De Gallina chopped chicken mixed with spicy cream sauce, onions & pecans, served with rice & side salad. It was simply creamy with enough spiciness to give it that bight that I love. The pecans give it a bit of crunch and mix it with the rice to make a spectacular dish. A must-try if you happen to stop by for a meal.
We decided to try out their desserts. We could see in the dessert case they had apple pie, cinnamon rolls, maple pie, and coconut cream cake. We ordered the apple pie ala mode and the coconut cake. The waiter was confused and brought cinnamon roll ala mode. We did tell him that he brought out the wrong dessert but we decided not to waste it and kept the dish. He didn't offer to take it off the bill but we weren't going to be jerks and ask for it to be taken off. We shared the desserts among the four of us and thought they were delicious. The cake was moist and had just enough frosting with it covered in coconut.
The prices were reasonable with the most expensive dish at $14.95 but that was a steak dinner. Their breakfast is super cheap considering what you get. See the menus below for more details.
Watch our YouTube video review of the 4 C's Restaurant below...
All in all, it was a good experience. You can check them out on Facebook or on their website. You can order online starting at 11am. It doesn't look like they have delivery but you can order and pick it up.
Contact them by phone at (540) 727-0739 or on their website.
Our rating system is 1 - 5 stars.
1 ⭐ =Poor. There’s nothing good about the restaurant. We won't be returning.
2 ⭐ ⭐ =Okay. The restaurant has one or two good qualities. It might be a delicious dish, helpful staff, or an inviting atmosphere. Still, you have no interest in visiting again.
3 ⭐ ⭐ ⭐ =Good. A fine example of a specific kind of restaurant. It can be delicious food with excellent service. We may think about returning if we wish to have that particular cuisine.
5 ⭐ ⭐ ⭐ ⭐ ⭐ = Extraordinary. Meets an elite standard by which you judge all other restaurants. The staff is always ready to help, the premises are extremely clean, the atmosphere is lovely, and the food is both delicious and beautifully presented.
We gave The 4 C's ⭐ ⭐ ⭐ ⭐ because it took almost an hour to receive our food and the waiter got our dessert wrong. The food was wonderful and we would definitely be going back. We do recommend you try it out when you are in Culpeper, Virginia.
We'd love to hear from you. Have you visited this restaurant? Have you eaten Peruvian foods? Comment below!
Stay sassy,
Kelly Sassy Silver Sisters Cathy, Rhonda, and Kelly
😊😊😊😊😊😊😊😊😊😊😊😊😊😊😊😊😊
Thank you for reading our blog post. If you haven't already subscribed to receive our weekly blog post and Recipe of the Week, just click the SUBSCRIBE button on the right of the page and you will be the first to find out what's going on in our sassy brains. 😜
The Recipe of the Week is a bonus for our subscribers and goes out via email mid-week. We also have a monthly GIVEAWAY for our subscribers. So, don't miss out and SUBSCRIBE TODAY! FTC DISCLAIMER: This page informs you of our disclosure statement regarding the advertisements we use and disclosure of our Service and the choices we have associated with it. The compensation received will never influence the content, topics, or posts made in this blog. All advertising is in the form of advertisements generated by a third-party ad network or affiliates. Those advertisements will be identified as paid advertisements. The owner(s) of this website is not compensated to provide opinions on products, services, websites, and various other topics. The views and opinions expressed on this website are purely the owners. If we claim or appear to be experts on a certain topic or product or service area, we will only endorse products or services that we believe, based on our expertise, are worthy of such endorsement. Any product claim, statistic, quote, or other representation about a product or service should be verified with the manufacturer or provider. This website does not contain any content which might present a conflict of interest.
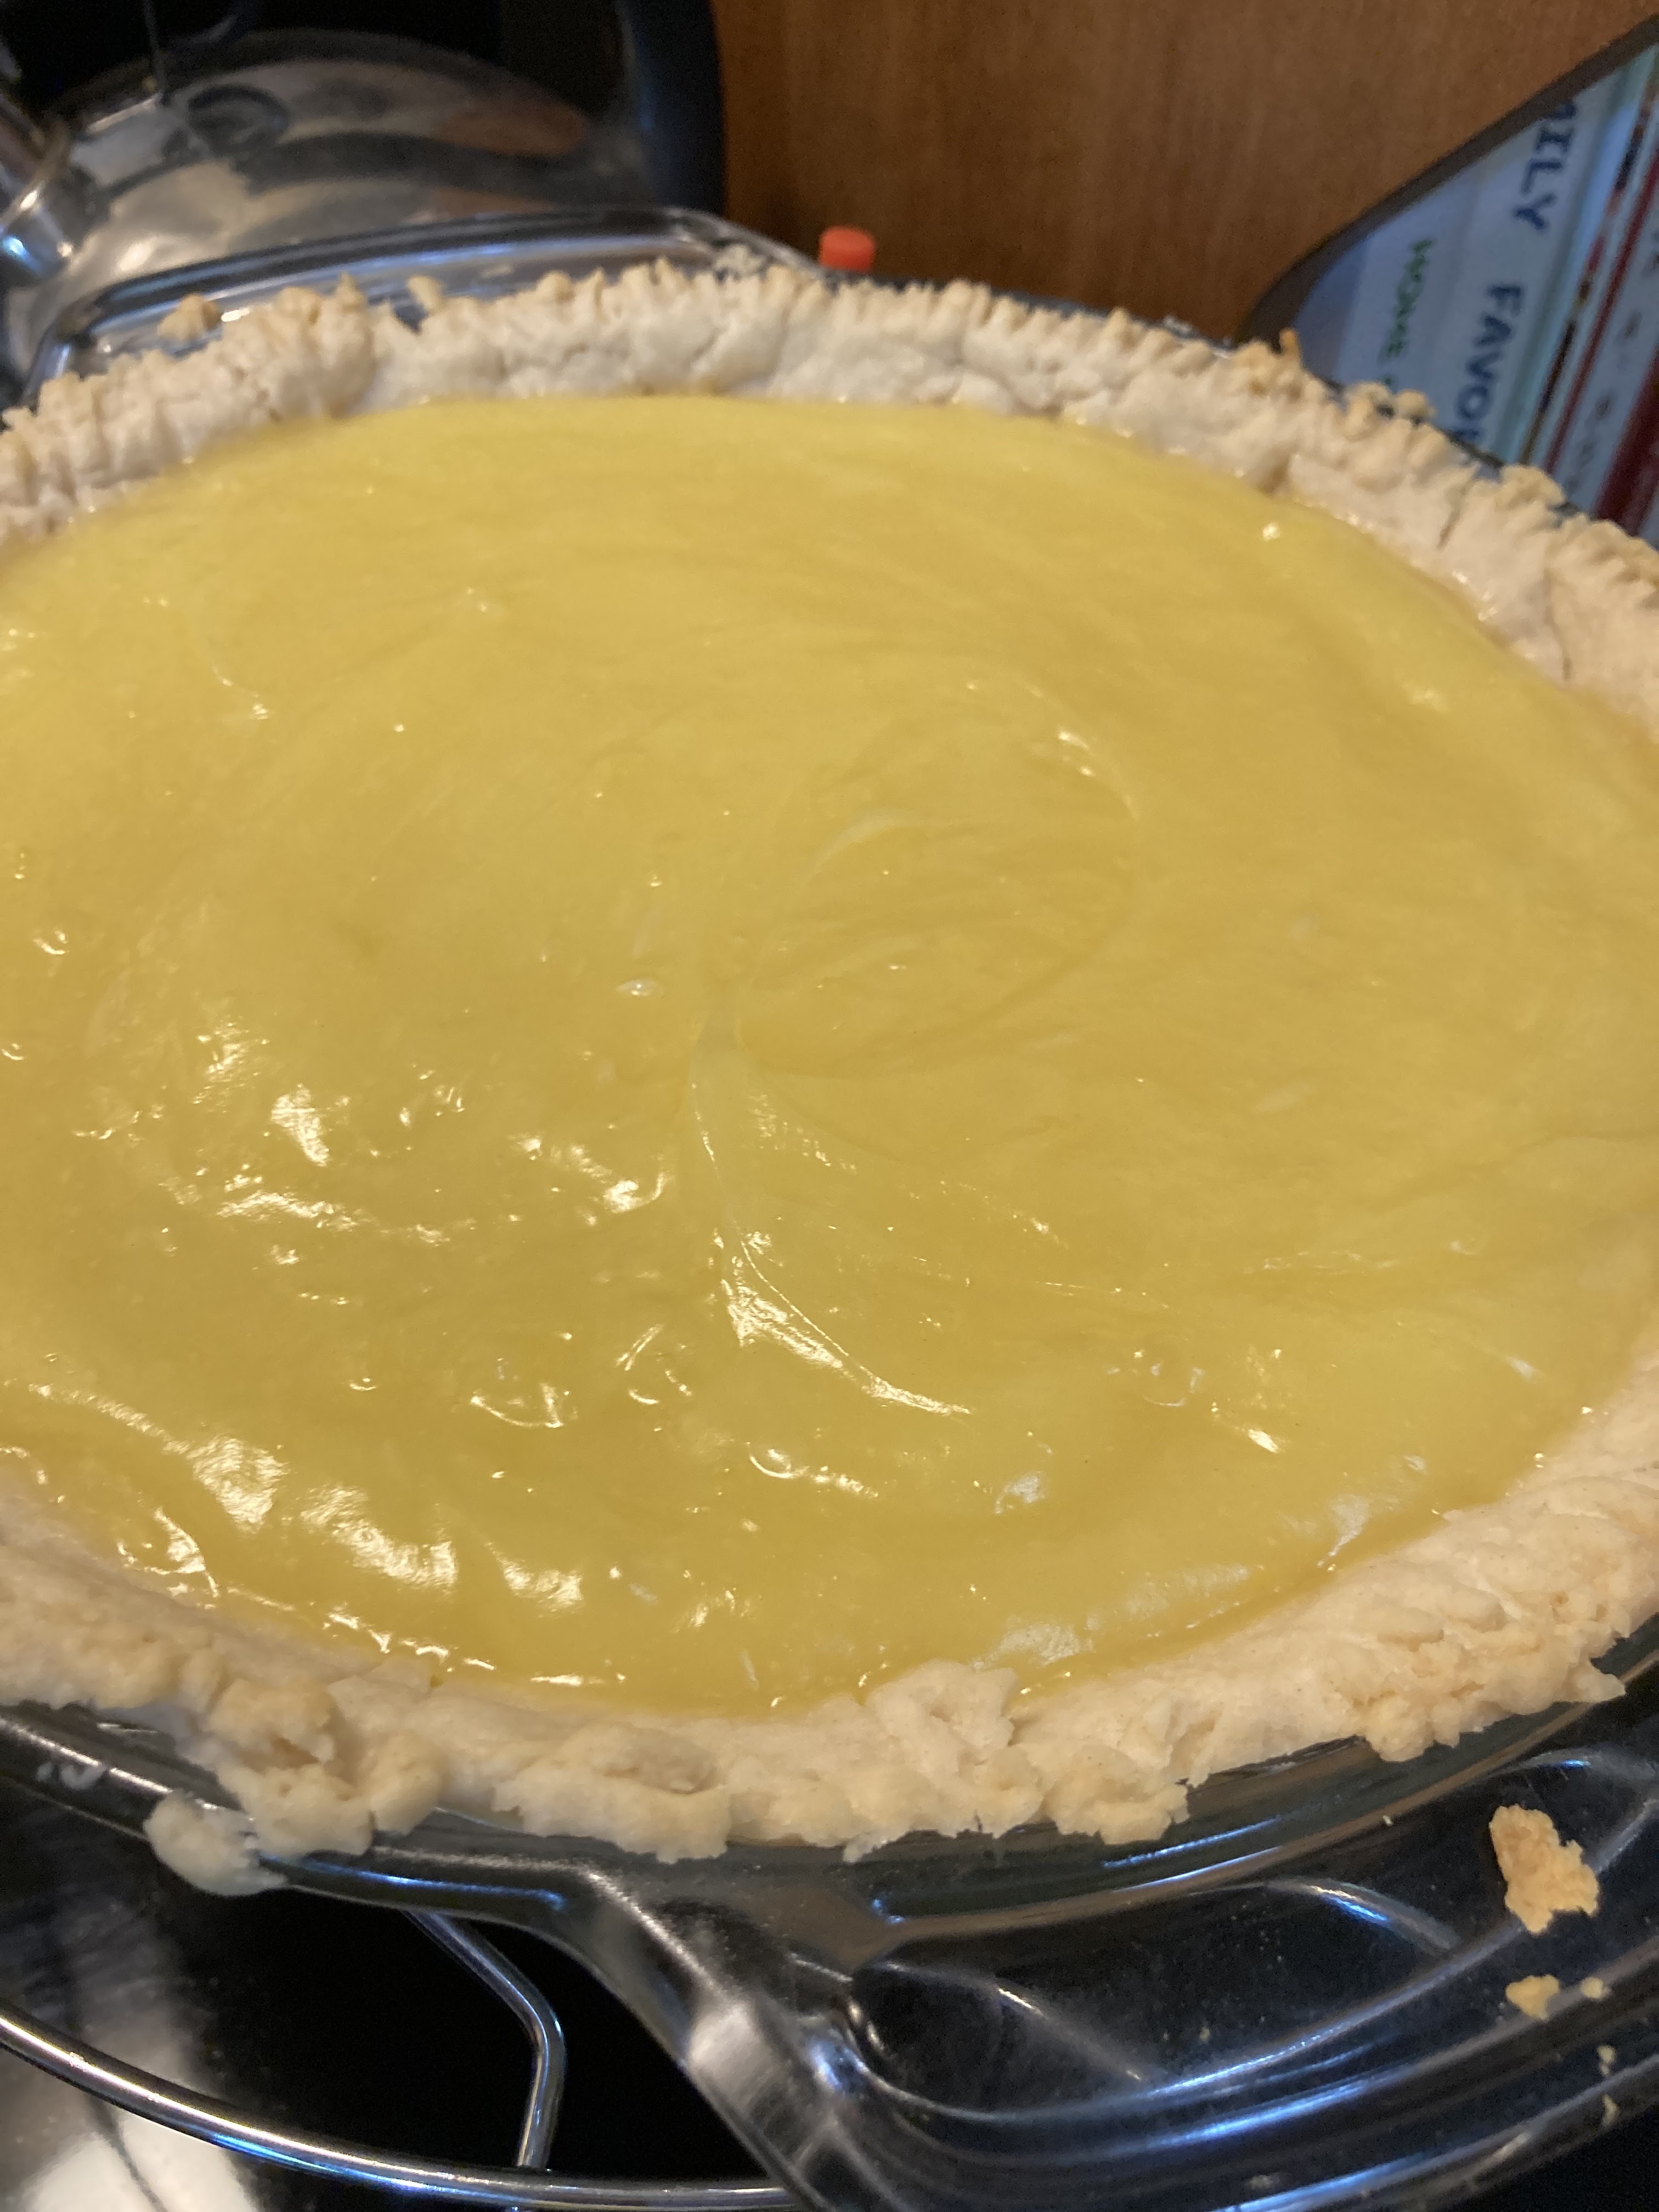
Taste of Home offers a monthly Bakeable’s Challenge. I missed the first 4 months so I'm starting with May and it happens to be Lemon Meringue Pie. Better late than never is my motto.
I've always been impressed with TOH recipes, as you could probably tell by the Recipe of the Week, I make a lot of their recipes. Why not, they are delicious and made by home cooks.
Classic Lemon Meringue Pie
Total Time Prep: 30 min. + standing Bake: 25 min. + chilling YIELD: 8 servings.
INGREDIENTS:
1-1/3 cups all-purpose flour
1/2 teaspoon salt
1/2 cup shortening
1 to 3 tablespoons cold water
FILLING:
1-1/4 cups sugar
1/4 cup cornstarch
3 tablespoons all-purpose flour
1/4 teaspoon salt
1-1/2 cups water3 large egg yolks, lightly beaten
2 tablespoons butter
1-1/2 teaspoons grated lemon zest
1/3 cup lemon juice
MERINGUE:
1/2 cup sugar, divided
1/2 cup sugar, divided
1 tablespoon cornstarch
1/2 cup cold water
4 large egg whites
3/4 teaspoon vanilla extract
Directions
1. In a small bowl, combine flour
and salt; cut in shortening until crumbly. Gradually add 3 tablespoons cold
water, tossing with a fork until dough forms a ball. (I used the food processor to combine the dough)
2. Roll out dough to fit a 9-in. pie
plate. (Using parchment paper folded over the disc of dough helps when rolling out, It makes it easier to roll, no sticking and transfer flawlessly to pie plate.) Transfer crust to pie plate. Trim to 1/2 in. beyond the rim of plate; flute
edge. Bake at 425° for 12-15 minutes or until lightly browned.
3. Meanwhile, in
a large saucepan, combine the sugar, cornstarch, flour, and salt. Gradually stir
in water until smooth. Cook and stir over medium-high heat until thickened and
bubbly. Reduce heat; cook and stir 2 minutes longer.
4. Remove from
the heat. Stir a small amount of hot filling into egg yolks; return all to the
pan, stirring constantly. Bring to a gentle boil; cook and stir 2 minutes
longer. Remove from the heat. Gently stir in butter and lemon zest. Gradually
stir in lemon juice just until combined. Pour into the crust.
5. Place egg
whites in a large bowl; let stand at room temperature for 30 minutes. For
meringue, in a saucepan, combine 2 tablespoons of sugar and cornstarch. Gradually
stir in cold water. Cook and stir over medium heat until the mixture is clear.
Transfer to a bowl; cool.
6. Beat egg
whites and vanilla until soft peaks form. Gradually beat in the remaining
sugar, 1 tablespoon at a time. Beat in cornstarch mixture on high until stiff
peaks form and sugar is dissolved (meringue will not be smooth). Spread evenly
over hot filling, sealing edge to crust.
7. Bake at 350°
for 25 minutes or until the meringue is golden brown. Cool on a wire rack for 1
hour. Refrigerate for at least 3 hours before serving. Refrigerate leftovers.
This was my first try at making a lemon meringue pie and I’m pretty excited about how it turned out. The crust was light and flaky while the lemon filling was firm and delectable. My husband and daughter thought it had way too much meringue but I disagree.
I’m excited about what TOH has for their baking challenge in June. Stay tuned!
I hope you make this recipe and if you do please use the #sassysilversisters and show us your pie. Do you like to make pies? What are your favorite pies to make?
Sign up for the challenge and share your accomplishments with us.
🍋🍋🍋🍋🍋🍋🍋🍋🍋🍋🍋🍋🍋🍋🍋🍋🍋🍋🍋🍋🍋
Stay sassy,
Kelly
Sassy Silver Sisters
Thank you for reading our blog post. If you haven't already subscribed to receive our weekly blog post and Recipe of the Week, just click the SUBSCRIBE button on the top of the page and you will be the first to find out what's going on in our sassy brains. 😜
The Recipe of the Week is a bonus for our subscribers and goes out via email mid-week.
We also have a monthly GIVEAWAY for our subscribers. So, don't miss out and SUBSCRIBE TODAY!
FTC DISCLAIMER: This page informs you of our disclosure statement regarding the advertisements we use and disclosure of our Service and the choices we have associated with it. The compensation received will never influence the content, topics, or posts made in this blog. All advertising is in the form of advertisements generated by a third-party ad network or affiliates. Those advertisements will be identified as paid advertisements. The owner(s) of this website is not compensated to provide opinions on products, services, websites, and various other topics. The views and opinions expressed on this website are purely the owners'. If we claim or appear to be experts on a certain topic or product or service area, we will only endorse products or services that we believe, based on our expertise, are worthy of such endorsement. Any product claim, statistic, quote, or other representation about a product or service should be verified with the manufacturer or provider. This website does not contain any content which might present a conflict of interest.
I love to use my Instant Pot. I've made everything from hard-boiled eggs to dessert. I did learn that if you make a dessert after making a pot roast, have an extra seal on hand because the seal holds odors and you may have a cake tasting like a pot roast. Learn from my mistakes 😉
I've searched the WWW for some 5-ingredient IP recipes for you to try. I have tried a few of these and they turned out great.
For you convenience, the full recipe is under the photo. If you desire to look at the original, click the links above the photos and it will take you to the author of the recipes.
Pour the olive oil into the bottom of your electric pressure cooker. Place the chicken breasts inside and sprinkle the parmesan, basil, and garlic powder on top.
Place the lid on the cooker and make sure the pressure knob is in the SEALING position. Using the display panel select the MANUAL/PRESSURE COOK function, high pressure, and use the +/- buttons until the display reads 6 minutes.
When the cooker beeps to let you know it’s finished, let the pressure release naturally for 5 minutes. Then switch the pressure knob from the SEALING to the VENTING position, causing a quick pressure release. Use caution while the steam escapes—it’s hot.
Open the lid and shred the chicken into the juices with a hand mixer or fork. If using a hand mixer, drape a towel over your hand, the mixer, and the pot so you avoid splatter getting onto your wall or countertop. Add sea salt and black pepper to taste.
Let chicken cool slightly before assembling sandwiches or salads. Store leftovers inside of a glass container and use them as salad topping throughout the week.
Recipe Notes
If working with frozen chicken breasts extend the cook time to 12 minutes.
For every additional pound of chicken, add 6 minutes.
If you are trying to watch your fat intake, use 1/4 cup of oil, and 1/4 cup of chicken broth in lieu of 1/2 cup oil.
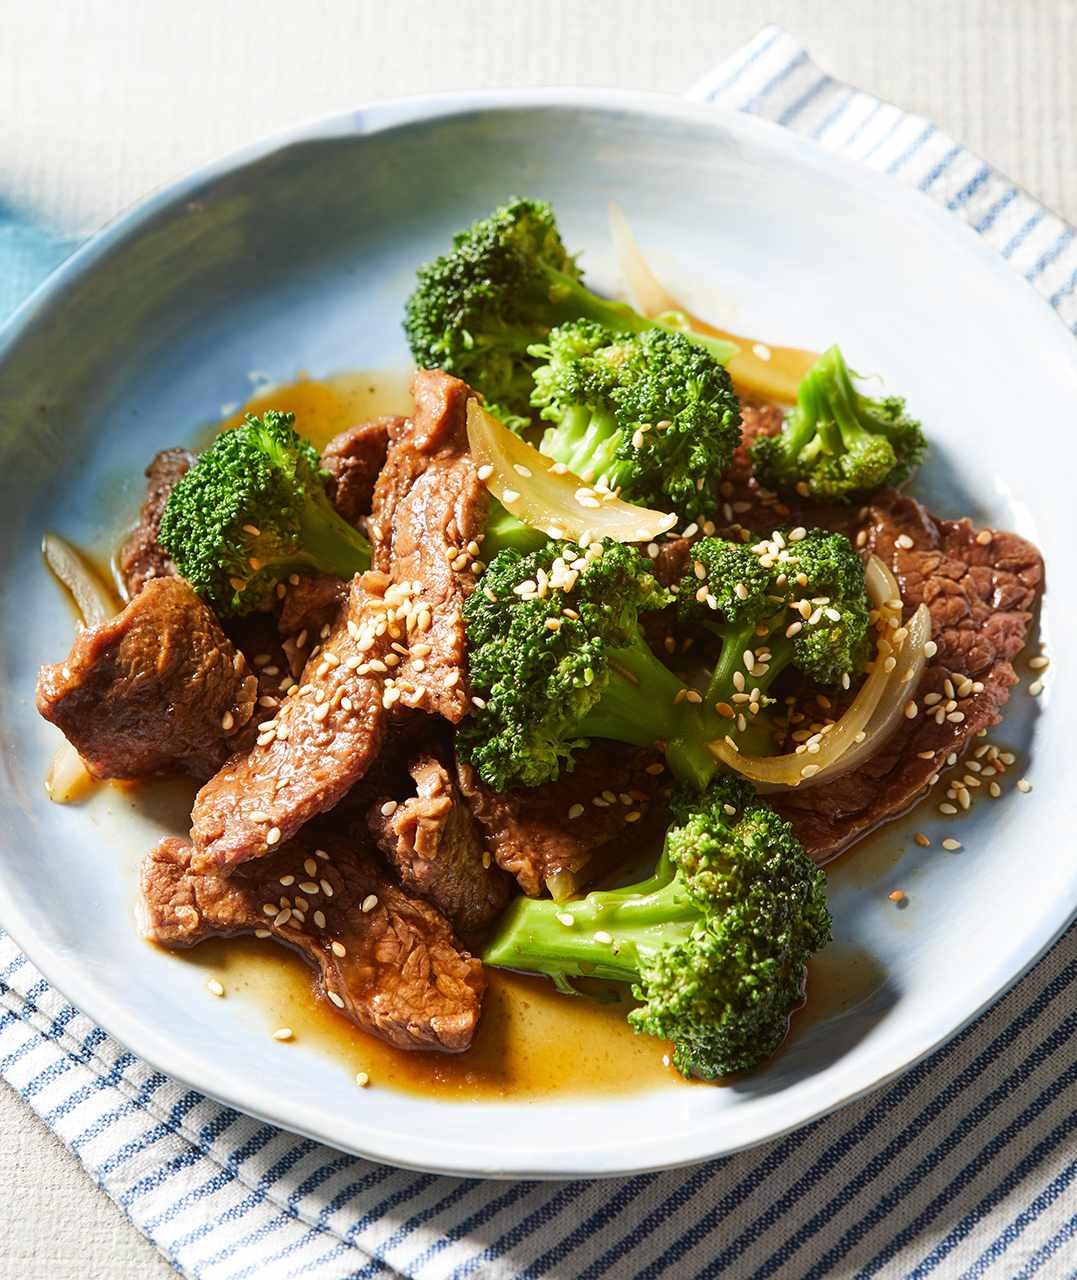
This Paleo Instant Pot recipe is even better than takeout. You can make your own beef and broccoli at home in less than half an hour, and unlike takeout, it's Paleo!
optional additions: cardamom powder, saffron, nuts for garnish
Oil or butter for greasing
Optional Crust Recipes (use the crust of your choice or go crustless):
Graham Cracker Crust
10graham cracker sheets (gluten-free works too!)
4tablespoonsmelted butter
Date and Nut Crust:
1cupnuts
5dates roughly chopped
Oatmeal Cookie Crust:
½cuprolled oats
¼cuppecans
¼cupbrown sugar
3tablespoonsmelted butter
Instructions
Optional Crust Recipes (use the crust of your choice or go crustless):
To make the Graham Cracker Crust: Process the graham crackers in a food processor to a fine crumb. Add the melted butter and pulse until moist. Press the crumbs into the bottom of a well-greased 6-inch cheesecake pan or 7-inch cheesecake pan with a removable bottom (you can use cooking spray or butter to grease the pan – make sure to get the sides of the pan too!).
To make the date-nut crust: add the nuts and dates to a blender and blend until it turns into a sticky, crumbly mixture. Add this mixture to the greased cheesecake pan with a removable bottom and press down to smooth it out.
To make the oatmeal cookie crust: Blend all of the ingredients together in a food processor until well combined. Press the crust onto the bottom of a greased 6-inch (or 7 inch) cheesecake pan with a removable bottom.
To make the Cheesecake:
Add the condensed milk, yogurt, and mango puree to a bowl and mix well.
Pour the mixture on top of the crust (if using) or straight into a greased 6-inch or 7-inch cheesecake pan (with a removable bottom), then cover the pan with foil.
Add 2 cups water into the steel inner pot, then place the trivet/wire rack that came with your pressure cooker into the pot. Place the pan on top of the rack.
Secure the lid, close pressure valve, and cook for 30 minutes at high pressure.
Naturally release pressure for 20 minutes, then release any remaining pressure (do not leave the cheesecake sitting in the pot). Stick a toothpick into the cheesecake and if it comes out clean, it’s done. If it’s still wet, pressure cook the cake for another 2 minutes.
Allow the cheesecake to cool down on a wire rack. I find it easiest to unmold the cheesecake while slightly warm.
Put the cheesecake in the fridge to chill for 4-6 hours.
Pour some mango puree on top of the cake right before serving. It adds a nice pop of color!
Notes
Since this recipe calls for a puree, I suggest using whole milk greek yogurt rather than regular whole milk yogurt because greek is thicker. If you have regular whole milk yogurt then you can use a sieve to separate some of the whey from the yogurt before measuring.
This is best when chilled (in my opinion) but you can also eat this warm or at room temperature as a pudding if you like. It will only taste like cheesecake after it has chilled. If you eat it warm, it will taste like a custard.
You can freeze this cheesecake! It tastes great when thawed but I’ve found they are a bit more crumbly. Still delicious though!
These Instant Pot Rice & Beans require only 5 simple ingredients to make! Perfect for Meal Prep or an Easy Weeknight Dinner. Vegan, Gluten-Free, Oil-Free.
INGREDIENTS
1 1/4 cup dry Red Kidney Beans
1 1/2 cup dry Brown Rice
1 cup Salsa
½ bunch Cilantro stems and leaves divided
3 cups Vegetable Broth
2 cups Water
INSTRUCTIONS
First, chop your Cilantro, keeping the leaves and stems roughly separated.
Add the dried Beans and Rice to the bottom of your Instant Pot.
Gently pour the Vegetable Broth and Water over the Rice and Beans, then give everything a good stir.
Next, add the Salsa and stems of the Cilantro into the pot. Do not mix!
Close the Instant Pot, set the valve to Sealing, and use the Manual Mode to cook on High for 25 Minutes.
One the cook time finishes, let the Instant Pot release pressure for an additional 10 minutes (leave the “Keep Warm” feature on).
Finally, move the valve from Sealing to Venting to release all remaining pressure, and serve the Beans and Rice warm. Garnish with the chopped cilantro leaves, and anything else you desire!
NOTES
A few of my beans rose to the top of the mixture, and I noticed they looked a little “dry” when I opened the pot. If this happens to you, simply mix the Beans and Rice together, then cover the pot again and let sit for 12 – 15 minutes.
Different beans require different amounts of time to cook in the pressure cooker, so I would be wary of substitutions. If you do decide to use a different bean, make sure to cook the mixture for at least 22 minutes, so the brown rice will cook completely.
1lb.boneless skinless chicken breastsabout two large breasts, cut into 1-2 inch cubes*
8oz.dry fettuccine or whole wheat linguine
1jar15 oz. alfredo sauce
1jar water15 oz.**
salt and pepper to taste***
Instructions
Hit saute setting on your Instant Pot and set a timer for 5 minutes.
Add olive oil, garlic and chicken to Instant Pot and saute for 5 minutes, stirring only once or twice. Add salt/pepper to taste.
Make sure no chicken is stuck to bottom after sauteing has finished.
Break dry/uncooked pasta in half and add into Instant Pot
Empty jar of alfredo sauce into Instant Pot. Refill the same jar with water and add to Instant Pot. Do not stir, sauce will thicken as it sits.
Seal, and set Instant Pot to 'high pressure' and set timer for 9 minutes.
Flip valve to release the pressure (quick release) and when pressure subsides, open the lid and stir.
Divide between 4 plates, top with parmesan and serve with a side of broccoli if desired, and enjoy!
Notes
*You can use frozen chicken. If chicken is frozen, cook for 15 minutes if chicken breasts are stacked or on top of each other. If you are able to lay frozen chicken flat on the bottom of the Instant Pot, cook for 10 minutes. You want the breasts a little pink at this point so they don't over-cook.**If you prefer a thicker sauce, use a 3/4 jar of water, instead of a full jar.*** water, salt, and pepper not included in 5 ingredients, because chances are you have those somewhere in your house :)
This Instant Pot Mashed Potatoes recipe is the easiest mashed potatoes ever. Fluffy, creamy, flavorful mashed potatoes can be on your dinner table in no time…
INGREDIENTS
1/2 cup regular-strength chicken broth or stock
3 lbs russet or Yukon gold potatoes, peeled and cut into 2-inch pieces
1/2 cup milk (regular or low-fat)
8 TB (1/2 cup or 4oz) butter, sliced and softened, plus more for drizzling
Kosher salt
(Optional seasonings: freshly ground black pepper, garlic powder or roasted garlic, chopped herbs of your choice)
INSTRUCTIONS
Pour broth into the inner pot of your Instant Pot. Place potatoes onto steamer rack. Close lid and lock in place. Turn steam release handle/valve to correct position, if needed. Cook on high pressure for 8 minutes.
While potatoes are cooking, combine milk and softened butter slices into a saucepan over low heat. Stir until butter is completed melted and milk is warmed through. Turn heat off and keep warm.
Once the pressure cooker is done cooking potatoes, do a Quick Release. Gently remove lid and remove steamer rack, sliding potatoes in the inner pot with the broth. Use a potato masher to mash potatoes until almost done.
Add warm milk/butter mixture and a generous sprinkle of kosher salt (any optional seasonings can be added now as well.) Keeping Instant Pot on “warm,” continue to hand-mash potatoes to your desired texture. Taste and add more salt, if needed. Serve with drizzle of melted butter, gravy, or as is.
NOTES
Russet potatoes tend to result in fluffier, lighter texture, while Yukon gold potatoes will yield a creamier consistency. The choice is yours; you can try combining both types of potatoes as well.
If you’d like to make roasted garlic mashed potatoes, you can roast the garlic a day ahead of time.
Over-mashing potatoes can lead to gumminess, so be sure to watch carefully as you mash and stop as soon as your potatoes turn creamy.
Finished mashed potatoes can be kept warm in the Instant Pot for 1-2 hours before serving, though the sooner you can serve it, the better. If needed, you can stir in a bit more liquid (broth or milk) to mashed potatoes before serving.
Stovetop option: boil peeled/cubed potatoes in a large pot of salted water for 15 minutes, or just until potatoes are fork-tender. Drain and proceed with recipe as written.
Do you have an Instant Pot? Do you have a favorite IP recipe? Please comment below 👇
Stay warm and sassy,
Kelly
Sassy Silver Sisters
Cathy, Rhonda & Kelly
💗💗💗💗💗💗💗💗💗💗💗💗💗💗💗💗
Thank you for reading our blog post. If you haven't already subscribed to receive our weekly blog post and Recipe of the Week, just click the SUBSCRIBE button on the right of the page and you will be the first to find out what's going on in our sassy brains. 😜
The Recipe of the Week is a bonus for our subscribers and goes out via email mid-week. So, don't miss out, and SUBSCRIBE TODAY!
FTC DISCLAIMER: This page informs you of our disclosure statement regarding the advertisements we use and disclosure of our Service and the choices we have associated with it. The compensation received will never influence the content, topics, or posts made in this blog. All advertising is in the form of advertisements generated by a third-party ad network or affiliates. Those advertisements will be identified as paid advertisements. The owner(s) of this website is not compensated to provide opinions on products, services, websites, and various other topics. The views and opinions expressed on this website are purely the owners. If we claim or appear to be experts on a certain topic or product or service area, we will only endorse products or services that we believe, based on our expertise, are worthy of such endorsement. Any product claim, statistic, quote, or other representation about a product or service should be verified with the manufacturer or provider. This website does not contain any content which might present a conflict of interest.


